
How to Braid Your Own Hair: Beginner Steps That Work
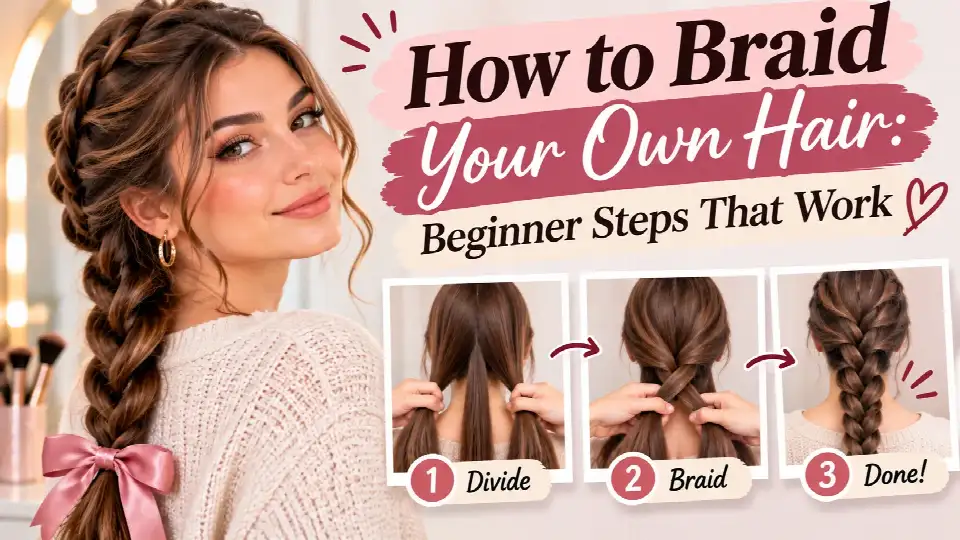
To braid your own hair, detangle it, divide it into three equal sections, then cross the right section over the middle and the left section over the new middle. Repeat to the ends and tie it off. Start with the braid over one shoulder, where you can see your hands, before braiding behind your head.
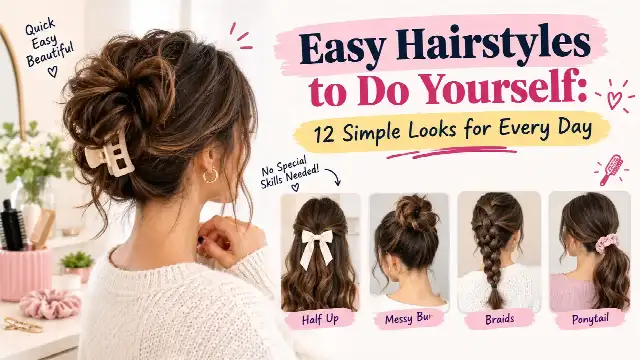
Every braid you'll ever want to learn, from French braids to crowns, is built on this same three-strand move. Once it feels automatic, the rest is just a variation. Braids are also one of the most useful easy hairstyles to do yourself, because they work for work, the gym, travel and sleep.
What you need
- A wide-tooth comb or a detangling brush.
- Two or three small hair elastics, ideally covered or snag-free ones.
- A mirror, plus a second hand mirror or your phone's front camera to check the back.
- Optional: a light texturizing spray or a little dry shampoo for grip.
Prep your hair first
Braiding is much easier on hair that isn't slippery or tangled.
- Detangle completely. Knots get trapped in the braid and make sections uneven. The American Academy of Dermatology suggests starting at the ends and working up, using a wide-tooth comb on wet hair.
- Add some grip. Freshly washed, silky hair slides apart. Second-day hair, or a light mist of texturizing spray, holds sections in place.
- Braid dry or slightly damp. Very wet hair is fragile and shrinks as it dries, which can make a braid feel tight later.
How to braid your own hair, step by step
Start with a side braid over one shoulder. You can see exactly what your hands are doing, and your arms won't get tired as quickly.
- Gather your hair. Brush all your hair over one shoulder.
- Split it into three equal sections. Hold the left section in your left hand, the right section in your right hand and let the middle section hang between them. Even sections make an even braid.
- Cross the right over the middle. Bring the right section over the middle one. It now becomes the new middle section.
- Cross the left over the middle. Bring the left section over the new middle section.
- Repeat. Keep alternating right over middle, left over middle. Pull each section gently outward as you cross it to keep the tension even.
- Smooth as you go. Every few crosses, run your fingers down the loose ends so they don't tangle.
- Tie it off. Braid down until about an inch of hair is left, then secure it with an elastic.
Once that feels easy, try the same steps behind your head with your hair in a low ponytail position. That's the starting point for a classic back braid.
Braiding behind your head without a mirror
Braiding where you can't see is mostly about feel, not sight.
- Look straight ahead, not at the mirror. Mirrors reverse your movements and can slow you down. Use the mirror to check the result, not to guide every cross.
- Keep your hands close to your head. The closer your hands stay to where the braid is forming, the tighter and neater it will be.
- Rest one arm at a time. If your arms get tired, hold all three sections in one hand, press it gently against your head and shake out the other arm.
- Check with a second mirror. Hold a hand mirror behind you, or take a quick photo, to see if the braid sits straight.
Common mistakes and how to fix them
| Problem | Why it happens | Fix |
|---|---|---|
| Lumpy, uneven braid | Sections weren't equal | Restart with three clean, equal sections |
| Braid twists to one side | One hand pulls harder than the other | Keep tension even and hands at the same height |
| Bumps at the top | Hair wasn't fully brushed back | Smooth your hair before you split it |
| Braid falls apart quickly | Hair too slippery or tension too loose | Add texture spray and braid a little more firmly |
| Short layers poke out | Layers end before the bottom of the braid | Smooth with a little cream or hairspray |
| Scalp feels sore | Braid is too tight | Loosen it and braid more gently next time |
Keep braids gentle on your hair
A neat braid doesn't need to be tight. The American Academy of Dermatology warns that hairstyles that pull, including tight braids and ponytails, can lead to traction alopecia, a type of hair loss caused by repeated pulling. Its advice is to wear styles loosely and change your hairstyle often.
- If a braid hurts, stings or causes small bumps on your scalp, take it out and redo it looser.
- Use covered elastics made for styling hair, as the AAD recommends, rather than rubber bands.
- Don't sleep in the same tight braid night after night. A loose braid for sleep is fine.
Which braid to learn next
Once the three-strand braid feels easy, these are the natural next steps, roughly from easiest to most advanced.
| Braid | What makes it different | Full guide |
|---|---|---|
| Bubble braid | No braiding at all, just elastics and puffed sections | How to do a bubble braid |
| Pigtail braids | Two three-strand braids, one on each side | How to do pigtail braids on yourself |
| Fishtail braid | Only two sections, with small pieces crossed over | How to do a fishtail braid |
| French braid | Adds hair to each section as you braid, crossing over | How to French braid your own hair |
| Dutch braid | Like a French braid, but crossing under so it stands out | How to Dutch braid |
| Waterfall braid | Drops a strand on each cross to create a cascade | How to do a waterfall braid |
| Crown braid | A braid that wraps around your head | How to do a crown braid |
Have a bob, a lob or lots of layers? Many of these braids still work, but you'll want small sections and a little more product. Our guide on how to braid short hair shows which styles hold best at shorter lengths.
FAQ
Why is it so hard to braid my own hair?
It feels hard because you're working by feel, often behind your head, and your arms get tired. Start with a side braid over your shoulder where you can see your hands, practice for a few minutes at a time, and move behind your head once the crossing pattern feels automatic.
Is it easier to braid wet or dry hair?
Dry or slightly damp hair is usually easiest. Very wet hair is more fragile and shrinks as it dries, which can make a braid tighter and less comfortable. Freshly washed, silky hair can be slippery, so a little texture spray helps.
How do I make my braid look thicker?
After you tie off the braid, gently pull the outer edges of each section outward, working from top to bottom. This is called pancaking, and it makes the braid look fuller. Hold the end of the braid while you pull so it doesn't come apart.
How long does it take to learn to braid your own hair?
Most beginners can do a basic side braid within a few practice sessions. Braiding behind your head and French or Dutch braids usually take longer, often a week or two of short daily practice, because your hands need to learn the movements without watching.
Sources
- Hairstyles That Pull Can Lead to Hair Loss, American Academy of Dermatology (accessed Nov 17, 2026)
- 10 Hair Care Habits That Can Damage Your Hair, American Academy of Dermatology (accessed Nov 17, 2026)
- Tips for Healthy Hair, American Academy of Dermatology (accessed Nov 17, 2026)
Spotted a mistake or something out of date? Email contact@stylifyo.com and we will check it.