

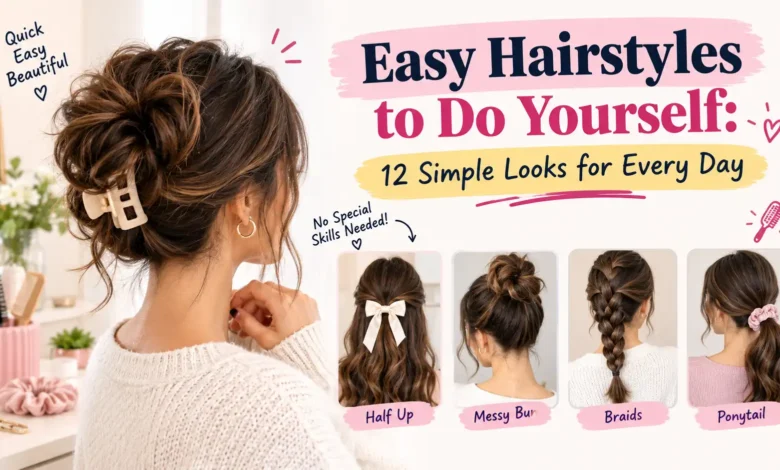
The best easy hairstyles to do yourself are a low ponytail, a messy bun, a claw clip twist, twisted-back front pieces and a half-up top knot. None of them needs heat, and each one uses a move you already know: gathering, twisting or pinning. The first four need no skill at all, and the fifth adds one small step. Start with these and you’ll have a style for almost any morning.
- Low ponytail: brush back, tie at the nape, done.
- Messy bun: a ponytail you stop pulling through halfway.
- Claw clip twist: twist your hair up and let the clip hold it.
- Twisted-back front pieces: two small twists pinned behind your ears.
- Half-up top knot: only the top section, twisted into a small bun.
Below are 12 easy hairstyles for women, sorted into three skill levels, with numbered steps for each one. You’ll also find the small kit they all use, how to pick a style for your hair type, and fixes for the problems that make a style slip by lunch.
Easy hairstyles to do yourself at a glance
If you only need quick and easy hairstyles for a rushed morning, pick from the Level 1 rows, which need no skill. Level 2 styles add one new move, and Level 3 styles are worth practicing on a day you’re not rushed. The times below are rough and assume you’ve tried the style once or twice. Your first attempt will take longer, and that’s normal.
| Style | Level | Approx. time | Best length | Good for | You need |
|---|---|---|---|---|---|
| Sleek low ponytail | 1 | 1–2 min | Shoulder length and longer | Work, errands | Elastic, brush |
| Messy bun | 1 | 2 min | Shoulder length and longer | Home, second-day hair | Elastic, a few pins |
| Claw clip twist | 1 | 1 min | Shoulder length and longer | Work, errands | Claw clip |
| Twisted-back front pieces | 1 | 3 min | Most lengths, including bobs | Keeping hair off your face | 2–4 bobby pins |
| Wrapped ponytail | 2 | 3 min | Shoulder length and longer | Work, dinner | Elastic, 1 pin |
| Bubble ponytail | 2 | 4 min | Long | Weekends, workouts | 4–6 small elastics |
| Half-up top knot | 2 | 3 min | Most lengths past the chin | Casual days | Elastic, a few pins |
| Low twisted bun | 2 | 5 min | Shoulder length and longer | Work, events | Elastic, 4–6 pins |
| Space buns | 2 | 6 min | Shoulder length and longer | Weekends, festivals | 2 elastics, pins |
| Loose side braid | 3 | 4 min | Shoulder length and longer | Casual days, humid days | 1 elastic |
| Beginner French braid | 3 | 8–10 min | Shoulder length and longer | Workouts, long days | Comb, 1 elastic |
| Headband tuck | 3 | 6 min | Shoulder length to mid-back | No-heat updo, events | Stretchy headband, pins |
Your starter kit and 3 skills every easy hairstyle uses
Easy hairstyles for beginners don’t need a drawer full of tools. Every style in this guide uses some mix of these six things:
- Covered elastics: fabric-covered hair ties, not office rubber bands.
- Bobby pins: a small pack in a shade close to your hair color.
- One medium claw clip: big enough to close fully over a twist of your hair.
- A brush and a wide-tooth comb: the brush smooths, the comb detangles.
- Dry shampoo or texturizing spray: adds grip so styles don’t slide out of clean, silky hair.
- A hand mirror or your phone camera: for checking the back.
Almost every step-by-step easy hairstyle below is built from three basic moves. Learn these once and every style on this page is just a new combination of them.
How to section your hair
- Brush out any tangles first, so the sections come apart cleanly.
- For a top section, place both thumbs just above your ears.
- Slide your thumbs back and up until they meet at the crown.
- Gather the hair above that line. Everything below stays down.
A comb’s tail or the back of a pin gives you a sharper line than your fingers, but fingers are fine for messy styles.
How to secure an elastic without pulling tight
- Hold the gathered hair in one hand and put the elastic over it with the other.
- Twist the elastic once to make a figure eight, then loop it back over the hair.
- Repeat until it feels snug. Fine hair usually needs more loops than thick hair.
- Stop when the ponytail stays put. It should never pull at your scalp.
“Snug, not tight” is the rule for every style here. The American Academy of Dermatology suggests you “Wear hair loosely pulled back” and “Use covered rubber bands made especially for styling hair” in its list of hair care habits that can damage your hair.
How to pin so it holds
- Hold the pin with its wavy side facing your scalp. That side grips better than the flat one.
- Open the pin slightly and slide it in against the direction the hair is going.
- Catch a little hair from the style and a little from your head underneath.
- Push it in flat until only the end of the pin shows.
- For extra hold, add a second pin crossing the first in an X.
Can’t see the back? That’s the hard part of easy hairstyles to do on yourself. Prop your phone on a shelf with the front camera on, or hold a hand mirror while facing a wall mirror. After a few tries, most of these styles work by feel.
Level 1: Lazy-day styles that need no skill
If you searched for beginner lazy easy hairstyles, start here: no sectioning, no braiding, and nothing to practice first. If you’ve made a ponytail before, you can do all four.
Sleek low ponytail
- Brush your hair back toward the nape of your neck.
- Smooth the top with the brush or your palms. A little water or cream helps tame flyaways.
- Gather the hair at the nape and secure it with an elastic.
- Split the ponytail in two and pull the halves gently apart to settle the elastic.
Works best on: straight, wavy and curly hair from shoulder length down. A center or deep side part both work.
Common slip: the ponytail drifts down by afternoon. Add texture spray at the nape before you tie it, so the elastic has something to grip. This is also one of the most reliable easy hairstyles for work, because it stays neat all day.
Messy bun
- Flip your head forward or brush your hair up to where you want the bun.
- Loop an elastic around it as for a ponytail.
- On the last loop, pull the hair only halfway through, making a loop with the ends hanging out.
- Spread the loop wide and wrap the loose ends around the elastic.
- Pin the ends and any sagging parts, then gently tug a few pieces loose at the front.
Works best on: second-day hair of shoulder length and longer. Very clean, silky hair holds better with a little dry shampoo first.
Common slip: the bun looks flat. Pull the loop wider before pinning, and loosen it with your fingertips instead of a brush.
Claw clip twist
- Gather your hair as if for a low ponytail, without an elastic.
- Twist the length in one direction until it starts to coil.
- Fold the twist up against the back of your head.
- Hold the open clip with its teeth facing your head, then close it over the twist so it grips both the twist and the hair underneath.
Works best on: shoulder length and longer. Thick hair needs a larger clip; fine hair holds better in a smaller one.
Common slip: the clip slides down. Twist tighter at the base and make sure the clip closes fully. For more ways to use one, from half-up looks to French twists, see our guide to claw clip hairstyles step by step.
Twisted-back front pieces
- Take a 1-inch section of hair from the front on one side.
- Twist it away from your face, adding a little more hair as you move back.
- Stop behind your ear and pin the twist in place with two pins crossed in an X.
- Repeat on the other side. Leave the rest of your hair down.
Works best on: almost every length, including bobs and grown-out bangs. It’s also a simple, cute style for keeping curly hair off your face without tying it all back.
Common slip: the twists unravel. Twist the section more tightly before pinning, and point the pins toward the back of your head.
Level 2: Cute and easy hairstyles that take one new skill
Each of these cute and easy hairstyles adds one move to Level 1: wrapping, stacking or coiling. They look more finished, and several work as easy updo hairstyles for dinners and events.
Wrapped ponytail
- Make a ponytail at any height.
- Take a small section from underneath the ponytail.
- Wrap it around the elastic until it’s covered.
- Tuck the end under and push a bobby pin up through the wrap into the base of the ponytail.
Works best on: shoulder length and longer. It turns a plain ponytail into something that looks planned.
Common slip: the wrap loosens. Use a smaller section, wrap it snugly, and pin through the center of the elastic.
Bubble ponytail
- Make a ponytail at the height you want.
- Add a small elastic about 2 inches below the first.
- Pull gently at the hair between the two elastics to puff it into a “bubble.”
- Repeat down the length, leaving the ends free.
Works best on: long hair. Thick hair makes fuller bubbles; fine hair looks fuller if you tease each section lightly first.
Common slip: uneven bubbles. Space the elastics by eye in a mirror, and pull the sides out a little at a time.
Half-up top knot
- Section off the top half of your hair, from ear to ear (see the sectioning steps above).
- Tie that section at the crown.
- Twist it and wrap it around its elastic into a small bun.
- Pin the ends under and loosen the knot slightly with your fingertips.
Works best on: most lengths past the chin, straight to curly. It’s a good option for second-day hair, since only the top is pulled back.
Common slip: the knot flops to one side. Tie the section higher and pin the bun on both sides.
Low twisted bun
- Make a low ponytail at the nape.
- Twist the ponytail until it starts to coil on its own.
- Wrap the twist around the elastic into a bun.
- Tuck the ends under and pin around the edge, pins pointing toward the center.
- Smooth the top with your palms.
Works best on: shoulder length and longer, any texture. It’s polished enough for work and events, which is why so many easy bun hairstyles start here.
Common slip: the bun feels heavy and droops. Use more pins around the edge instead of one or two big ones.
Space buns
- Part your hair down the middle, from front to nape.
- Make a ponytail on each side, high on the head.
- Twist each one and wrap it into a bun.
- Pin both buns and check in a mirror that they sit at the same height.
Works best on: shoulder length and longer. Curly and coily hair can make fuller buns without twisting.
Common slip: one bun sits higher than the other. Tie both ponytails first, check them in the mirror, then twist.
Level 3: Styles worth practicing
These three need some practice. Try them first on a weekend, not on a morning when you have to leave in ten minutes.
Loose side braid
- Brush all your hair over one shoulder.
- Split it into three equal sections.
- Cross the right section over the middle, then the left section over the new middle.
- Repeat to the ends and tie with an elastic.
- Gently pull the edges of the braid outward to make it look fuller.
Texture helps a braid look fuller and hold. Jennifer Korab, a celebrity hairstylist, certified colorist and founder of Renaissance Salon and Spa, told IPSY: “I love adding dimension to braids with a texturing spray.”
Works best on: shoulder length and longer, any texture.
Common slip: the braid is loose at the top and tight at the bottom. Keep the same tension from start to finish, and bring the braid forward over your shoulder so your arms don’t tire.
Beginner French braid
- Take a section at the top of your head and split it into three.
- Cross the right strand over the middle, then the left over the middle, once.
- Before the next cross, add a little loose hair from that side to the strand.
- Keep crossing and adding hair from each side as you work down.
- When no loose hair is left, finish with a regular braid and tie the end.
Works best on: shoulder length and longer. It holds well for workouts and long days.
Common slip: the braid wanders off-center. Pick up equal amounts of hair from each side, and keep your hands close to your head.
Headband tuck
- Put a stretchy headband over your hair, sitting like a crown.
- Starting at one side, tuck small sections of hair up and over the band.
- Work around the back, tucking a section at a time.
- Tuck the ends in at the nape and pin any loose parts.
Works best on: shoulder length to mid-back. It gives you a rolled updo with no heat and no elastic in your hair.
Common slip: the band slides up. Choose a headband with some grip, and tuck smaller sections so the weight spreads evenly.
How to pick an easy style for your hair type and length
Most easy hairstyles to do yourself work on most hair, but some suit certain lengths and textures better. Use this table as a starting point.
| Your hair | Try first | Tip |
|---|---|---|
| Short (chin to jaw) | Twisted-back front pieces, half-up top knot | Small clips and pins grip short hair better than elastics |
| Shoulder length | Claw clip twist, low twisted bun, half-up top knot | Pin the shorter layers that fall out |
| Long | Bubble ponytail, side braid, messy bun | Spread the weight with more pins, not tighter elastics |
| Thin or fine | Messy bun, bubble ponytail, half-up top knot | Texture spray first; loosen pieces for fullness |
| Thick | Low twisted bun, claw clip twist, French braid | A larger clip and extra pins take the weight |
| Curly or coily | Space buns, twisted-back pieces, headband tuck | Keep styles loose; comb while damp with a wide-tooth comb |
| Second-day or oily | Messy bun, low twisted bun, headband tuck | Dry shampoo at the roots, then style |
For short cuts, from pixies to bobs, our guide to easy hairstyles for short hair goes through the options length by length. If your hair is thin or fine, see hairstyles for thin hair for cuts and styles that add volume.
Easy hairstyles for your day: work, workouts and bedtime
The same few moves cover most of what a normal week asks of your hair. Here’s where to start for each situation:
- A regular workday: a sleek low ponytail, low twisted bun or claw clip twist looks neat and holds for hours.
- A job interview: go polished and off the face. Our guide to interview hairstyles matches styles to different industries.
- The gym: a French braid or bubble ponytail keeps hair out of your way. For styles that hold through sweat and lying on a bench, see gym hairstyles.
- A run: bounce and wind make running its own problem, so we have separate running hairstyles for that.
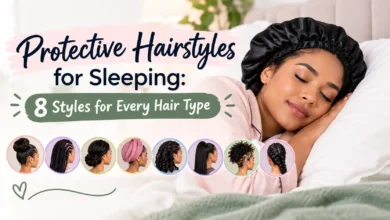
- Bedtime: a loose braid or a low, loose bun reduces tangles. See protective hairstyles for sleeping for every hair type.
- A rainy or humid day: braids and buns hold their shape better than hair left down.
Doing your makeup the same morning? Our guide to the order to do your makeup covers whether hair or makeup should come first.
Common mistakes and quick fixes
Most easy styles fail for the same few reasons: the hair is too slippery, the weight isn’t supported, or the base isn’t smooth. Here’s how to fix the usual problems.
| Problem | Why it happens | Fix |
|---|---|---|
| Bun slips down | Hair too clean or silky; too few pins | Dry shampoo or texture spray first; pin around the whole edge |
| Bumps on top | Hair gathered without smoothing | Brush toward the elastic as you gather, then smooth with your palms |
| Pins show | Pins pushed in at an angle | Slide pins in flat, against the direction of the hair |
| Ponytail droops by noon | Elastic sitting on slippery hair | Texture at the base; split the ponytail and pull the halves apart to settle it |
| Braid looks lumpy | Uneven sections or tension | Use three equal sections; keep your hands close to your head |
| Flyaways everywhere | Dry or static hair | A drop of cream or water on your palms, smoothed over the top |
The biggest upgrade takes no extra skill. Bailey Englert, a hairstylist at the Frédéric Fekkai salon in New York City, told Marie Claire that “distinct parting and clean edges, whether pulling hair back or keeping it down,” are key to making a quick style look chic. A straight part and smooth hairline make even a simple ponytail look deliberate.
Keep easy styles gentle on your hair
Any style can strain your hair if it pulls. The American Academy of Dermatology (AAD) warns that tightly pulled buns, ponytails, updos and braids can cause hair loss called traction alopecia. Its advice on hairstyles that pull is to “Switch up your hairstyle regularly so your hair can recover from tight styles.”
The AAD lists these signs that a style is pulling too hard:
- “Pain from tightly pulled hair”
- “Stinging on your scalp”
- “Crusts on your scalp”
- “Tenting (sections of your scalp pulled up like a tent)”
If you notice any of them, loosen or change the style. The AAD also notes that “Some types of hair loss, including traction alopecia, can be permanent the longer they go untreated,” and that “If you have hair loss, it’s never too early to see a board-certified dermatologist.”
A few everyday habits help too. None of the styles here needs heat, but if you curl or straighten first, the AAD says “Use the lowest heat setting.” For combing, it advises letting straight hair “dry a bit” before combing with a wide-tooth comb, and for textured hair or tight curls, “Always comb your hair while it is damp, using a wide-tooth comb.”
Frequently Asked Questions
What is the easiest hairstyle to do yourself?
A low ponytail is the easiest hairstyle to do yourself. It takes one elastic and about a minute, and it works on most lengths from the shoulders down. A messy bun comes a close second, since it’s the same ponytail with the hair pulled only halfway through. Both look neater if you smooth the top before tying.
How can I make my hair look nice with no skill?
Easy hairstyles for beginners start with the parts that need no skill: a clean part, smooth edges and a snug elastic. Then pick a Level 1 style, like a low ponytail or claw clip twist. A little dry shampoo or texture spray makes any style hold better, and gently pulling a few pieces loose makes a simple style look intentional rather than rushed.
Are quick and easy hairstyles bad for your hair?
Not if they’re loose. The problem is tension, not the style itself. The AAD links tightly pulled ponytails, buns and braids to traction alopecia, and recommends loose styles and covered elastics. Keep elastics snug but not tight, avoid pins that dig in, and change the style if you feel pain or stinging on your scalp.
Is it okay to wear a ponytail every day?
The AAD’s warnings are about ponytails pulled tight, so a loose one is the safer everyday choice. Even then, give your hair a break from the same tension: change the ponytail’s height from day to day, use covered elastics, and take it down when you’re at home. If your scalp hurts or stings, loosen or change the style.
Do easy hairstyles work better on clean or second-day hair?
Many buns, braids and twists hold better on second-day hair, because it has more grip than freshly washed, silky hair. If your hair is clean, a little dry shampoo or texturizing spray at the roots and lengths adds that grip. Sleek styles, like a low ponytail, can look better on clean hair.
How do I do hairstyles on myself without seeing the back?
Use your phone’s front camera propped on a shelf, or hold a hand mirror while facing a larger mirror. Do the steps slowly the first few times, then repeat the style a few days in a row. Most of these styles quickly become something you can do by feel, without looking at all.
The short version
The best easy hairstyles to do yourself are the low ponytail, messy bun, claw clip twist, twisted-back front pieces and half-up top knot. Learn the three base skills (sectioning, securing an elastic and pinning in an X), and the rest of the list is just new combinations of the same moves. Add one Level 2 style a week, and save the French braid for a relaxed weekend.
Keep every style snug, not tight, and change it up often. On days when your roots need a wash, start with our hairstyles for greasy hair. With a small kit and a few easy hairstyles to do in the morning, you won’t need a salon or a lot of time to look put together.

10 Comments