

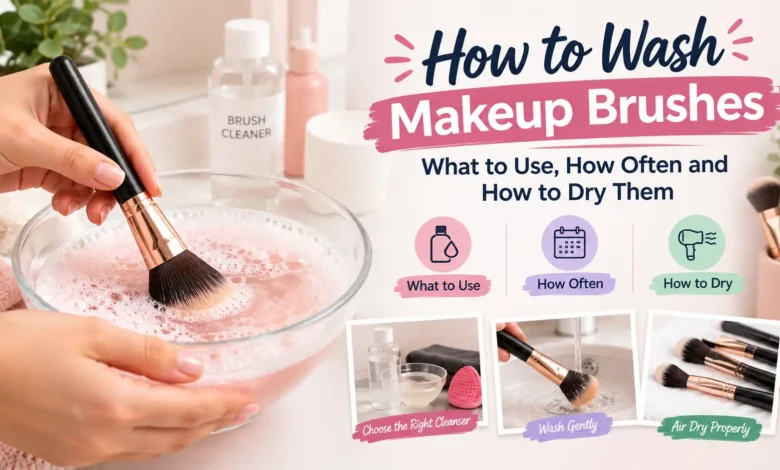
Here’s how to wash makeup brushes in one sentence: rinse just the tips under lukewarm water with the bristles pointing down, swirl them in a bowl of water with a little gentle shampoo, rinse until the water runs clear, squeeze out the excess, and let them dry lying flat with the bristles hanging over the edge of a counter. The American Academy of Dermatology suggests doing this every 7 to 10 days.
That’s the whole method. The details are what keep your brushes in good shape and help protect your skin: what to clean makeup brushes with, how often each type needs it, and how to dry them without loosening the glue. Clean brushes also make the rest of your makeup routine easier, because they lay down product more evenly.
- How often: every 7 to 10 days as a baseline, and weekly for brushes used with liquid or cream products.
- What to use: a gentle or clarifying shampoo in lukewarm water.
- Protect the glue: wash only the bristles, keep them pointing down, and skip hot water.
- Drying: flat or tilted with the tips down, never upright and never with a hair dryer.
Why clean your makeup brushes?
Every brush picks up old makeup, oil and dead skin each time you use it. According to the American Academy of Dermatology’s guide to cleaning makeup brushes, “Dirty makeup brushes can cause an infection, such as a fungal infection, E. coli, or a staph infection, which can be very serious.”
Dermatologist Mary Brady, MD, of Geisinger puts it simply: “This buildup creates prime real estate for bacteria to grow, which can spell trouble for your skin.” Dermatologist Melissa Piliang, MD, quoted by Cleveland Clinic, adds: “Keeping your makeup tools clean can go a long way toward keeping harmful bacteria from getting on your face.”
There’s a practical side too. Brushes clogged with old product stop blending properly, which can make your makeup look heavy and cakey even when you use the right amount.
How often to clean makeup brushes
Advice varies depending on who you ask, mostly because brushes used with different products get dirty at different speeds. Here’s what five well-known sources say.
| Source | How often |
|---|---|
| American Academy of Dermatology | Every 7 to 10 days |
| Geisinger (Dr. Mary Brady) | Every seven to 10 days |
| Cleveland Clinic | Liquid or cream brushes weekly, eye brushes every two weeks, powder brushes monthly |
| WebMD | Every 7 to 10 days; liquid brushes at least weekly, eye brushes every two weeks, powder brushes monthly |
| Ulta Beauty | Foundation and concealer brushes every one to two uses, eye brushes weekly, lip brushes after every use, powder brushes every one to two weeks |
A simple rule that fits the dermatology sources: wash all your brushes at least every 7 to 10 days, and wash brushes you use with liquid or cream products weekly. Brushes used around the eyes deserve particular care. As Dr. Piliang told Cleveland Clinic, “Your eyes are more prone to infection, so makeup brushes you use in that area should be washed regularly.” Ulta suggests cleaning lip brushes after every use.
Signs a brush needs washing now, whatever the calendar says:
- the bristles feel stiff, sticky or clumped together
- you can see product color at the base of the bristles
- it leaves streaks or patches instead of blending
- it smells musty or of old makeup
What to clean makeup brushes with
You don’t need a special product. Several gentle cleansers work, as long as you rinse them out fully. Sources don’t agree on everything, so here’s how they compare.
| Cleanser | What sources say | Best for |
|---|---|---|
| Gentle or clarifying shampoo | The AAD’s recommendation | All brushes; the safest default |
| Baby shampoo or mild soap | Cleveland Clinic lists gentle, mild soap such as baby shampoo | Everyday washing |
| Dish soap | Cleveland Clinic and Geisinger allow it; Ulta says many beauty professionals note it “may strip and dry out natural bristles over repeated use” | Synthetic brushes with heavy, oily product (our reading of the sources) |
| Brush cleanser | Made for the job; follow the label | Anyone who prefers a dedicated product |
| Alcohol-based spray cleaner | Ulta: suited to “spot cleaning synthetic bristle brushes between uses” | Quick cleans between washes, not a replacement for washing |
Two cautions. The AAD notes that “Using plain soap and water can dry out the bristles,” which is why it recommends shampoo. And no dermatology source we checked recommends household surface cleaners for brushes that touch your face, even though some cleaning-product websites suggest them.
A simple DIY makeup brush cleaner
The easiest homemade makeup brush cleaner is the one the AAD describes: “Fill a bowl with lukewarm water and a tablespoon of either gentle shampoo or clarifying shampoo.” If you’re wondering how to clean makeup brushes at home without special products, that’s all it takes. Some guides also suggest a vinegar mix, but WebMD’s version uses hot water, which conflicts with the AAD’s lukewarm-water advice, so the shampoo method is the simpler choice.
Natural vs synthetic bristles
Synthetic bristles, common on foundation and concealer brushes, handle alcohol-based spot cleaners well, according to Ulta. Natural hair bristles, often found on powder and eyeshadow brushes, behave more like hair. Ulta notes that for natural bristles, “repeated alcohol exposure dries the fibers over time,” so gentle shampoo is the better choice. If you’re not sure what your brushes are made of, treat them as natural and use shampoo.
How to wash makeup brushes properly, step by step
This is how to wash makeup brushes the way the AAD describes, with a few details that protect your brushes.
- Rinse the tips. Hold the brush with the bristles pointing down and run lukewarm water over the tips to remove loose makeup. Keep water away from the ferrule, the metal part that holds the bristles.
- Make the wash. Fill a bowl with lukewarm water and add about a tablespoon of gentle or clarifying shampoo.
- Swirl each brush. Swirl the bristles in the bowl, or massage a little of the mixture into them in the palm of your hand.
- Rinse under running water, still with the bristles pointing down.
- Repeat until the water runs clear. Foundation and concealer brushes often need more than one round.
- Squeeze out the water. Gently press the bristles with a clean, dry paper towel or cloth, and reshape the head with your fingers.
- Dry flat. Lay the brush on a towel with the bristles hanging off the edge of the counter.
The AAD explains why you only rinse the tip: “submerging the whole brush head will eventually dissolve the glue.” Water temperature matters for the same reason. Makeup artist Patel, quoted by Makeup.com, says: “I do not recommend using hot, hot water when deep cleaning, as that can also break down the glue much faster than anticipated and cause a lot of shedding.”
How to dry makeup brushes (without ruining them)
Drying is where most brushes get damaged. The goal is to keep water from running back into the ferrule.
- Flat, with the tips over the edge: the AAD and Cleveland Clinic method. Lay the brush on a towel so the bristles hang off the edge of the counter, so air can reach the bristles.
- Tilted, tips down: Geisinger suggests drying brushes at an angle so the bristles sit lower than the handle.
- Never upright: the AAD warns, “Do not dry your brushes upright in a container,” because water runs down into the ferrule and loosens the glue.
- No hair dryer: Patel told Makeup.com, “Don’t try to speed up the process with a hair dryer, as that can really damage the glue holding the brush hairs together.” e.l.f. and Ulta give the same warning.
How long makeup brushes take to dry depends on their size and density.
e.l.f. estimates 4 to 6 hours for small eye brushes, 6 to 8 hours for medium face brushes, 8 to 12 hours for dense foundation brushes and 12 to 24 hours for large powder brushes. Ulta’s estimates are a little shorter: around 6 to 8 hours for dense face brushes and 2 to 4 hours for smaller eye brushes. Cleveland Clinic’s advice is simply to leave them to dry overnight.
How to dry makeup brushes faster, safely: squeeze out as much water as you can and blot with a towel, reshape the bristles, and put them somewhere with good air circulation (our practical tip). For small and medium brushes, washing them in the evening usually means they’re dry by morning; dense foundation and powder brushes can need a few more hours, based on the ranges above. Don’t use heat.
Spot cleaning, deep cleaning and sanitizing
Spot cleaning and deep cleaning do different jobs. Ulta describes spot cleaning as using “a fast-drying solution to remove surface product from bristles quickly without using water,” useful between uses or when you switch colors. Deep cleaning with water and cleanser, as described above, is what removes buildup from deeper in the bristles. Ulta adds that “Spot cleaning alone is not sufficient for brushes used daily with liquid or cream formulas.”
For sanitizing, a thorough wash with shampoo and water is the main step. Alcohol-based spray cleaners can be used on synthetic brushes between washes; they’re flammable, so keep them away from heat and open flames, and don’t use them repeatedly on natural bristles.
If you develop an eye infection, stop using your eye makeup and see a doctor. Dr. Piliang advises: “If you develop a very red eye, eye drainage or any eye pain after applying makeup, it’s time to call your doctor.” Our practical advice: wash, or replace, any brushes you used around your eyes during that time before you use them again.
When to replace makeup brushes
Shedding is often a sign of damaged glue from hot water, heat or water left in the ferrule, or simply an old brush. Good brushes can last a long time with regular washing, so replacement depends on condition rather than a fixed date. Cleveland Clinic’s guidance: “When your makeup brush becomes frayed or worn, or when a brush loses its shape, it’s time to replace it with a new one.”
Other signs it’s time to replace a brush:
- it sheds bristles every time you use or wash it
- the ferrule is loose or the handle is cracked
- it still smells or looks stained after a thorough wash
- the bristles feel rough or scratchy on your skin
Brushes and makeup age on different schedules. Products have their own shelf lives, and it’s worth knowing how long makeup lasts too.
Frequently Asked Questions
Can you clean makeup brushes with dish soap?
Yes. Cleveland Clinic and Geisinger both list dish soap as an option. It’s good at cutting through oily foundation, but Ulta notes that many beauty professionals say it may strip and dry out natural bristles over time. The AAD’s first choice is a gentle or clarifying shampoo. In our reading of the sources, dish soap is best kept for synthetic brushes, followed by a thorough rinse.
Can you use hand soap or bar soap on makeup brushes?
You can, but it isn’t the best choice. The AAD notes that plain soap and water can dry out the bristles, which is why it recommends a gentle or clarifying shampoo instead. If hand soap or bar soap is all you have, use a small amount and rinse thoroughly, then go back to shampoo for your next wash.
Can you clean makeup brushes with olive oil?
Some DIY guides suggest mixing olive oil with dish soap to break down long-wear or waterproof makeup, but none of the dermatology sources we checked recommend it. Oil also needs extra rinsing to get out of the bristles. Gentle or clarifying shampoo in lukewarm water, as the AAD describes, is the simpler, better-supported method.
Can you use micellar water to clean makeup brushes?
The dermatology sources we checked don’t mention micellar water for brushes. At most, it works as a quick surface wipe between washes, much like a spot cleaner. It isn’t a substitute for a proper wash with shampoo and lukewarm water, which is what the AAD recommends every 7 to 10 days. If you use it, still deep clean on schedule.
How long do makeup brushes take to dry?
Usually several hours to a full day, depending on size and density. Small eye brushes can dry in a few hours, while dense foundation brushes and large powder brushes can take 8 to 24 hours, according to e.l.f.’s estimates. For most brushes, washing them in the evening and leaving them to dry overnight, as Cleveland Clinic suggests, is enough. Give dense brushes longer if they’re still damp.
Can you use a hair dryer on makeup brushes?
No. Heat can soften the glue that holds the bristles in the ferrule, which leads to shedding and loose brush heads. Makeup artist Patel, quoted by Makeup.com, warns against using a hair dryer to speed things up, and e.l.f. and Ulta say the same. Squeeze out as much water as you can and let the brushes air-dry instead.
Can you clean makeup sponges the same way?
Not quite. Sponges soak up much more water and liquid makeup than brushes, and they dry more slowly, so they need their own routine and a more frequent schedule. Our guide to how to clean makeup sponges covers the method, how often to do it, and when to replace them.
Should you share makeup brushes?
No. The AAD advises that you “never share your makeup brushes with anyone else, and wash them often.” Geisinger’s Dr. Brady gives the same advice, because sharing can pass bacteria from one person to another. If you do makeup for someone else, use separate brushes or wash them thoroughly before you use them on yourself.
Should you wash new makeup brushes before using them?
It’s a sensible habit. New brushes can shed a few loose bristles at first and may have picked up dust or residue from packaging and handling. A quick wash with lukewarm water and gentle shampoo, using the same method above, lets you check for shedding and start with clean bristles. This is our practical advice rather than a dermatology guideline.
The short version
If you only remember one thing about how to wash makeup brushes properly, make it this: rinse the tips with the bristles pointing down, swirl them in lukewarm water with a little gentle shampoo, rinse until clear, squeeze, and dry them flat with the bristles hanging over the counter edge. Do it every 7 to 10 days, and weekly for brushes used with liquid or cream products.
Keep water out of the ferrule, avoid hot water and hair dryers, and never dry brushes upright. Replace a brush when it frays, sheds or loses its shape. Clean brushes last longer, blend better and are kinder to your skin.





One Comment