

How to style layered hair comes down to giving each layer a direction. Blow-dry in sections with a round brush, turning the ends under for polish or out for movement, then cool each section before releasing it. On no-heat days, scrunch in a light mousse or cream and air-dry.
Layers are cut to different lengths, so they fall at different points and react differently to heat, humidity and your hands. That’s why the same cut can look shaped one day and choppy the next.
- The core move: dry each layer in the direction you want it to sit, then cool it in place.
- Brush size: the shorter the layer, the smaller the round brush.
- No heat: scrunch in product and air-dry, or loosely braid slightly damp hair overnight for waves.
- Fine hair: lift at the roots and keep products light.
- Curly hair: define with product, diffuse on low, and don’t touch while it dries.
- Heat: low or medium settings, a heat protectant, and keep the dryer moving.
No round brush? Rough-dry with your fingers, then bend the ends under or out with a flat iron (straighteners in the UK). Short on time? See the five-minute section below. Curly or coily hair? Skip the round-brush steps and go to the texture section.
How to style layered hair with a blow-dryer, step by step
A blow-dry gives layers the most control, because you decide where each one sits. You’ll need a heat protectant, a wide-tooth comb, a paddle brush for dry hair, a round brush, a few sectioning clips and a dryer with a concentrator nozzle.
The AAD suggests aiming for hot tools about once a week or even less often, and every blow-dry, flat-iron bend or curl counts. On other days, use the no-heat methods below. When you do use heat, keep it low, use a heat protectant and heat only the pieces that need it.
1. Detangle gently
Towel-blot your hair rather than rubbing it, then detangle with a wide-tooth comb, since the AAD says hair is delicate when it’s wet and recommends a wide-tooth comb instead of a brush to detangle it. Work from the bottom up. The American Academy of Dermatology’s tips for healthy hair advise: “Slowly comb the ends of your hair first then keep combing higher to detangle your hair with minimal damage.”
2. Apply heat protectant
Mist or smooth a heat protectant through damp hair, focusing on the mid-lengths and ends. The AAD is direct about heat: “No matter your hair type, excessive heat can cause damage. Limit blow drying and use of tools like flat or curling irons. Use low or medium heat settings and a product to protect your hair from the heat.”
3. Rough-dry until mostly dry
Dry your hair with your fingers, not a brush, until it’s mostly dry, with only a little dampness left. Point the airflow down the hair shaft, from roots to ends, so the hair lies smoother. If you want volume at the roots, lift them with your fingers as you dry.
4. Section your hair
Clip the top and sides out of the way and start at the nape. Work in sections about as wide as your brush. Smaller sections take longer but give a smoother, more controlled finish, especially where the layers are shortest.
5. Choose your round brush
As a rough guide, the shorter the layer, the smaller the barrel. A small or medium round brush suits chin- to shoulder-length layers, while a large one suits long layers and gives a softer bend. A brush that’s too big for a short layer won’t grip it, and one that’s too small can over-curl long pieces.
6. Direct each layer
Place the brush under a section at the roots, lift slightly for volume, and pull it through slowly while the dryer follows along the top of the brush, without the nozzle touching the hair or brush, and keep the hot barrel away from your scalp.
At the ends, roll the brush under for a polished, turned-in shape or turn it out for flipped, piecey movement. Keep the dryer moving and the nozzle pointing down the hair, not straight at it.
7. Cool, then finish
While the section is still wrapped around the brush, switch to the cool setting for a few seconds. Cooling helps the shape hold. When you’ve finished, add a pea-sized amount of light serum to the ends only if they look dry, or a little texture spray for piecey layers.
How to style layers without heat
Layers often look good with very little work, because the cut already creates shape. The AAD’s list of hair care habits that can damage your hair starts its heat advice with: “Let your hair air dry when possible.”
- Scrunch and air-dry: on damp hair, scrunch in a light mousse (fine hair) or a cream (thick or wavy hair). Don’t touch it again until it’s fully dry, then scrunch out any stiffness.
- Twist for bend: twist the front and top sections away from your face and clip them loosely with soft clips while your hair dries, since hard clips can leave a dent. Release and shake out.
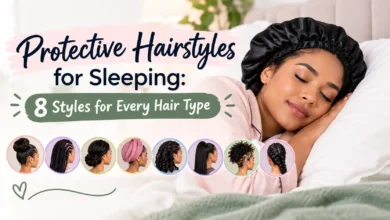
- Braid overnight: loosely braid slightly damp or dry hair before bed and undo it in the morning for soft waves. Don’t sleep on soaking-wet hair, and keep the braid loose, because wet hair is fragile and a tight braid pulls at the roots. Our guide to protective hairstyles for sleeping covers which overnight styles are gentlest on your hair.
- Velcro rollers: roll the crown and front sections while your hair is slightly damp or dry, and leave them in while you do your makeup or get dressed. They add lift and a soft bend with no hot tool, though the effect is subtler on fully dry hair. Unroll gently so the hook side doesn’t snag, and skip them if your hair tangles easily.
Leave-in products work best in small amounts. Too much weighs layers down and makes the shorter pieces separate into strings.
Five-minute layers, wolf cuts and butterfly cuts
Wolf and butterfly cuts: wolf cuts have short, choppy layers on top, and butterfly cuts combine long layers with shorter face-framing pieces, so both suit texture more than smoothness. Rough-dry with your fingers, flipping your head over for the last minute for lift. Work a little texture spray or light cream through the ends, then pinch the top layers. The round brush is optional.
Any layered cut in five minutes: rough-dry until mostly dry, then use a round brush on the top and front layers only. The back can often be left to air-dry, since the front is what people see most.
Straight hair: it drops texture quickly, so mist texture spray at the roots and bend just the front pieces. Medium shag or flow cuts, including on men: work a little sea salt or texture spray through towel-dried hair, rough-dry with your fingers, then push it back or to the side. No round brush needed.
On the second day: apply dry shampoo at the roots, then reshape only the pieces that have flattened or flipped, with a flat iron bend or a quick round-brush pass with the dryer on low heat. Or, the night before, braid your hair loosely while it’s only slightly damp for easy waves in the morning.
Styling by length
How to style long layers
To style long layers, blow-dry with a large round brush, turning the longest ends under, then use a small or medium brush to turn the face-framing layers away from your face. For waves, curl alternating sections in different directions, leaving the last inch or so straight if you like an undone finish, then run your fingers through once they’ve cooled. Without that movement, long layers read as one flat length.
Shoulder-length layers
At shoulder length, the ends bounce off your shoulders and flip. If you want a smooth shape, dry the ends under with a medium round brush and cool them on the brush, or bend them under with a flat iron.
If they still flip, a trim just above or below the shoulder line can help, so ask your stylist. If you like the flip, lean into it: dry the ends outward and finish with a little texture spray.
How to style short layered hair
To style short layered hair, focus on the roots and the ends. For a smooth bob, dry the ends under with a small round brush. For a textured pixie or crop, skip the brush and shape with your fingers.
Either way, start by rough-drying with your fingers and lifting at the crown. Finish with a small amount of paste, wax or pomade rubbed between your fingertips and pinched into the ends for definition. Our guide to easy hairstyles for short hair has more ideas for pixies, bobs and lobs.
Styling layers by hair texture
Texture changes how layers behave, so match the method to your hair type.
Fine hair: layers look stringy when the ends are thin and separated. Use a light mousse or root spray, dry the roots first, and skip oils and rich creams on the ends. If the ends still look sparse, ask your stylist for fewer or longer layers. Our guide to hairstyles for thin hair covers which cuts and styles make fine hair look fuller.
Thick hair: layers remove some weight, but thick hair can still puff out at the sides. Use a smoothing cream, dry in smaller sections with your fingers or a paddle brush first, then a large round brush for shape. Give the underneath sections as much attention as the top.
Wavy hair: layers help waves form. Scrunch in a curl cream or mousse, then air-dry or diffuse on low. Touch up only the pieces that dry straight or frizzy with a curling wand.
Curly hair: skip the round-brush steps above. One common method: work leave-in and a gel or cream into each section while your hair is very wet, then scrunch upward. Diffuse on low heat and low speed, or air-dry, and don’t touch or brush while it dries.
Once curly layers are dry, scrunch out any cast and lift the roots with your fingers or a pick. If the sides still expand while the top sits flat, a stylist experienced with curly cuts can reshape the layers.
Coily hair: layered coily hair is often worn in defined or stretched styles, such as twist-outs, braid-outs or a low-heat blowout. On wash day, detangle with a leave-in and your fingers or a wide-tooth comb while your hair is damp, then apply your cream or gel in small sections and set the style. If you blow out, use low heat and a heat protectant.
On day three, mist dry sections lightly with water and a little leave-in, re-twist or finger-coil only the pieces that lost definition, and lift the roots with a pick. A satin bonnet or scarf at night helps the shape last.
How to style face framing layers
To style face framing layers, dry each front piece away from your face with a small or medium round brush, then set it with cool air. With no heat, tuck the pieces behind your ears or pin them back.
- Curve away from the face: blow-dry each front piece with a small or medium round brush, rolling it back and away from your face. This opens up the face and keeps the front layers out of your eyes.
- Flick out: dry the ends outward, or bend them out with a flat iron, for a lifted, 1970s-style look.
- Tuck behind the ear: shows off the layer length with no tools.
- Pin back: twist each front piece back and hold it with a bobby pin, wavy side against your scalp, or use small clips.
- Limp by noon: lift each front piece at the root with your fingers or a small round brush, set it with cool air, and keep cream and oil off it. If your front hairline is thinning, tell your stylist so they can keep those layers longer, and see a board-certified dermatologist if the thinning is new or sudden.
- Curtain bangs: dry them first, while still damp, with the airflow going left and then right to stop a stiff split, then roll each side away from the face.
While curtain bangs and face-framing layers grow out, they usually hit the eyes, then the cheekbones, then the chin. Part them in the middle and roll them away from your face with a small round brush, setting with cool air. Once they’re too long for that, pin them back or work them into a half-up style.
Easy looks for layered hair
These four looks cover most days. For more low-effort ideas, see our guide to easy hairstyles to do yourself.
- Beach waves: scrunch texture spray into damp hair, air-dry, then bend only the front pieces with a flat iron.
- Sleek and straight: blow-dry smooth, flat-iron the ends slightly under and finish with a drop of serum.
- Half-up: twist the top layers back and clip or pin them; the shorter pieces stay loose around your face.
- Bouncy blowout: round-brush each section, then add a few velcro rollers at the crown while it cools.
Using a flat iron or curling iron on layers
Hot tools, including flat irons (straighteners in the UK), are useful for shaping specific layers, especially the front and top. Use them only on fully dry hair with a heat protectant, and pick a tool with adjustable heat so you can use the lowest setting that works for your hair. Keep the hot barrel or plates away from your scalp, ears, neck and face when you style short front layers.
- Bend the ends: clamp a flat iron near the end of a section, turn it slightly under or out, and glide off. It’s the quickest way to control flips.
- Curl away from the face: for face-framing layers, curl each piece back and away.
- Alternate directions: for waves through long layers, alternate sections so they don’t clump together.
- Use small sections: shorter layers need smaller sections to catch the ends.
- Let it cool: leave each curl or bend alone until it cools, then shape it with your fingers.
Hot tools also need safe handling. In 2023, research presented by the American Academy of Pediatrics looked at burns from hair styling tools among people aged 24 and younger. In that study, curlers and curling irons caused most of the injuries and most happened at home.
The lead author, Dr. Brandon Rozanski, noted in the news release: “Electric hair styling tools can reach temperatures as high as 450ºF in a matter of minutes, creating potential situations of unintentional burn injury for both the device user and surrounding bystanders.”
Rest tools on a heat-resistant surface, never leave them on unattended, keep them out of children’s reach, and unplug them and let them cool completely before storing them.
Why your layers look wrong, and how to fix them
| Problem | Styling fix |
|---|---|
| Layers flip the wrong way | Dry the ends in the direction you want, then bend with a flat iron |
| Flat at the roots | Lighter products, root mousse, lift the roots while drying |
| Choppy or disconnected | Dry all layers in one direction, then soften the ends with a little cream |
| Stringy ends (fine hair) | Less serum and leave-in; keep oils off the ends |
| Poofy or triangle shape | Smoothing cream and smaller sections; diffuse curls, don’t brush them dry |
| Frizzy, separated pieces (humid or rainy days) | Blot instead of rubbing, leave-in on wet hair, seal with a little cream or gel, hands off until dry |
| Pieces fall out of updos | Add dry shampoo for grip and pin the short layers first |
| Uneven air-dry | Apply product right after washing, before any section dries |
If daily styling never fixes the shape, the cut may need blending. Ask your stylist to soften the transition between layers, or to cut them to suit how you actually wear your hair, air-dried or blow-dried.
Ponytails, buns and updos with layers
Short layers often slip out of ponytails and buns, but a few tricks keep them in place.
- Add grip first: dry shampoo or texture spray at the roots and through the lengths gives short pieces something to hold on to. Aerosol sprays can be flammable, so follow the label and use them after, not while, you use a hot tool.
- Place it lower: low or mid-height ponytails and buns catch more of the shorter layers than high ones.
- Pin the short pieces: tuck the layers that fall out with bobby pins, crossing two in an X for extra hold.
- Messy bun: twist into a low bun, pin the short pieces and leave two front strands out on purpose.
A claw clip twist is one of the easiest updos for layered hair. Our guide to claw clip hairstyles step by step shows how to catch the shorter pieces.
Protecting layered hair from heat damage
A 2011 lab study on hair samples in the Annals of Dermatology found that “Hair surfaces tended to become more damaged as the temperature increased.”
The same study concluded: “Although using a hair dryer causes more surface damage than natural drying, using a hair dryer at a distance of 15 cm with continuous motion causes less damage than drying hair naturally.” Fifteen centimeters is about 6 inches. It was a lab study on chemically untreated hair samples, so treat it as a sensible habit, not a rule.
- Keep the dryer moving and, when you aren’t brushing a section, about 6 inches from your hair.
- Use low or medium heat and a heat protectant.
- Save flat irons and curling irons for the pieces that need them.
- Get regular trims so damaged ends don’t make layers look frayed.
If you notice breakage, scalp soreness or burns from hot tools, stop heat styling and see a board-certified dermatologist, or get medical care for a burn.
Layered hair styling questions
What size round brush is best for layers?
Match the brush to the length of the layer. A small or medium barrel suits chin- to shoulder-length layers and face-framing pieces, while a large barrel suits long layers and gives a softer, looser bend. If the brush won’t grip a section, it’s too big; if long hair over-curls, it’s too small.
Should layers flip in or out?
Both work; choose by the finish you want. Turning the ends under looks smoother and more polished, while flipping them out gives movement and a more casual, textured look. Many people turn the longest layers under and the face-framing pieces away from the face, which combines both.
How do I stop my layers looking choppy?
Dry all the layers in the same direction, so they fall together instead of apart. Then smooth a small amount of cream or serum over the ends to blend them. A flat iron bend on the shortest pieces helps. If the cut itself has sharp steps, ask your stylist to soften them.
Can you curl layered hair?
Yes. Curl dry hair in small sections, alternating directions for a natural look, and curl face-framing pieces away from your face. Shorter layers need a smaller barrel or a flat iron bend. Let each section cool before you touch it, then run your fingers through for softer waves.
How do you style grown-out layers?
Treat the in-between lengths as part of the shape. Bend the ends in one direction with a round brush or flat iron, tuck or pin the pieces that fall forward, and use half-up styles and claw clips. A light trim to blend the longest and shortest layers makes the grow-out stage easier.
Is air-drying or blow-drying better for layered hair?
Air-drying uses no heat, and the AAD recommends it when possible. Blow-drying gives more control over where layers sit. A lab study found a moving dryer held about 6 inches away caused less damage than natural drying in that setup, so if you blow-dry, use low heat and keep it moving.
Which method to use today
How to style layered hair on any given morning depends mostly on your time and your texture:
- Five minutes: rough-dry, then shape only the top and front.
- Twenty minutes: the full round-brush blow-dry, section by section.
- No heat: scrunch and air-dry, or last night’s loose braid.
- Curly or coily: define while wet, then leave it alone to dry.
If your layers still won’t sit the way you want after a few tries, the fix may be a small adjustment to the cut rather than more styling.