
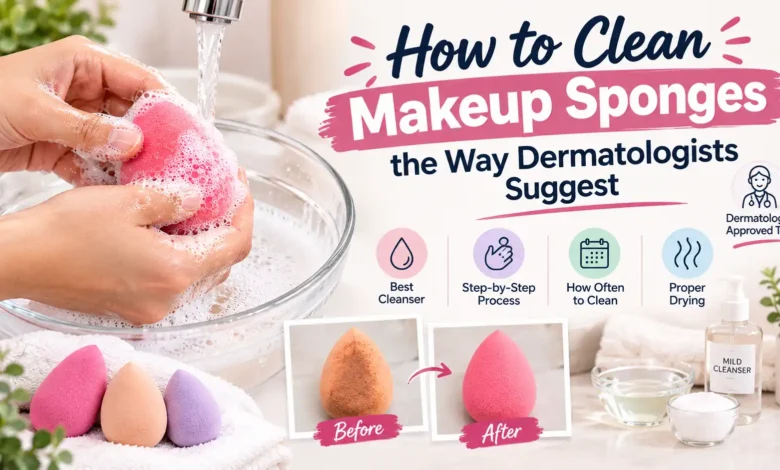
Here’s how to clean makeup sponges in one sentence: squeeze the sponge in a bowl of warm water with a few drops of liquid soap for about 15 seconds, rinse it under warm running water until the water runs clear, squeeze out the excess, and let it air dry in the open. Dermatologists recommend doing this after every use.
Yes, you can wash makeup sponges, and it’s easy to do at home with things you already have. Knowing how to clean makeup sponges properly comes down to a few details, though: a sponge soaks up far more water and liquid makeup than a brush, so how you wash it, dry it and store it all count. If you’re still working out where a sponge fits in your makeup routine, start there. This guide covers the sponge itself.
- How often: after every use, as the American Academy of Dermatology recommends. Never let it go longer than a week.
- What to use: warm water and a few drops of gentle liquid soap or cleanser.
- What to skip: the microwave, vinegar, very hot water and household cleaners.
- Drying and replacing: air dry it in the open, and replace it about every three months, or right away if you see mold.
Why cleaning your makeup sponge matters
A makeup sponge is used damp and pressed into foundation, concealer and skin oil every time you use it. That combination is the problem. As Cleveland Clinic explains, “Sponges absorb makeup, and the moisture can potentially lead to bacteria and yeast overgrowth.”
The best-known research on this comes from a study by Aston University in the UK, published in the Journal of Applied Microbiology. Researchers tested used makeup that people had donated, and found that “Ninety-three per cent of beauty blenders had not been cleaned and 64% had been dropped on the floor and continued to be used.”
Of the five product types tested, the beauty sponges carried the heaviest bacterial load, and fungi were especially common in them. Across the used products, the team also detected bacteria including E. coli and Staphylococcus aureus. The study’s lead author, Dr. Amreen Bashir, said in Aston University’s announcement that more needs to be done to educate people about “the need to wash beauty blenders regularly and dry them thoroughly.”
The American Academy of Dermatology (AAD) notes that dirty brushes and sponges can cause acne breakouts, rashes and skin infections. None of this means your sponge is dangerous. It means a quick wash is worth the minute it takes.
There’s a cosmetic reason too. A sponge clogged with old foundation doesn’t bounce or blend the way it should, which can make your base look streaky or cakey even when you use the right amount of product.
How often to clean makeup sponges
Most sources agree that sponges need cleaning more often than brushes, because they’re used damp and soak up liquid makeup. Here’s what five sources say.
| Source | How often |
|---|---|
| American Academy of Dermatology (Cynthia Bailey, MD, FAAD) | After every use |
| Geisinger | Spot clean after every use |
| Parade (with input from two dermatologists) | After each use |
| Beautyblender (the sponge’s original maker) | After every use |
| Healthline | At least once a week |
Dermatologist Cynthia Bailey, MD, puts it plainly on the AAD’s site: “Sponges should be cleaned after every use.” Geisinger’s makeup-tool guidance explains why sponges come first: “Anything you use to apply liquid makeup, like sponges, needs more frequent cleaning. Spot clean them after every use.”
So the simple rule for cleaning makeup sponges is to wash yours after every use. If you use one every day and can’t always manage that, our practical tip is to keep two sponges and rotate them, so one can wash and dry fully while you use the other. Either way, never go longer than a week, the minimum Healthline suggests.
Dermatologist Debra Jaliman, MD, told Parade: “Many people wait weeks between cleanings, which allows bacteria to accumulate on the sponge.”
Wash it before you use it again if:
- it fell on the floor (in the Aston study, 64% of the beauty sponges had been dropped and kept in use)
- it smells musty or sour (if the smell stays after washing, replace it)
- someone else has used it
- you had a breakout or rash while using it (our practical advice; if the skin problem doesn’t settle, see a dermatologist)
What to clean makeup sponges with
The best way to clean makeup sponges is also the simplest: warm water and a gentle cleanser. You don’t need a special product, though sources disagree on a few details.
| Cleanser | What sources say | Our take |
|---|---|---|
| Liquid soap or cleanser | The AAD’s method uses “a few drops of liquid cleanser or soap” in warm water | The everyday default |
| Mild soap or clarifying shampoo | Healthline recommends these and says to avoid scrubbing soaps and fragranced ones | Good for sponges used with heavy foundation |
| Gentle dish soap | Clean My Space lists gentle dish soap alongside shampoo and facial cleanser; Beautyblender warns that “Harsh soaps, dish detergent, and alcohol-based cleansers can damage your sponge” | A small amount for oily, long-wear makeup, rinsed out well; not for every wash |
| Sponge cleanser (liquid or solid) | Made for the job; Beautyblender recommends its own | Fine if it’s gentle; follow the label |
What to skip:
- Household all-purpose cleaners. Some cleaning-product websites suggest soaking sponges in them, but no dermatology source we checked recommends household surface cleaners for a tool you press onto your face.
- Vinegar. The sponge’s maker specifically warns against it (see the microwave section below).
- Very hot or boiling water. Warm water is what the AAD describes, and heat can damage the sponge itself.
- Rubbing alcohol. Beautyblender lists alcohol-based cleansers among the products that can damage a sponge.
How to clean makeup sponges, step by step
This is how to clean a makeup sponge the way Dr. Bailey describes it for the AAD, with two details that help keep the sponge from tearing. It’s all you need to clean makeup sponges at home.
- Wet it first. Hold the sponge under warm running water and squeeze it a few times so it softens and expands.
- Make a soapy bowl. Fill a bowl with warm (not hot) water, adding a few drops of liquid soap or cleanser as it fills.
- Massage for about 15 seconds. Put the sponge in the bowl and squeeze and release it, so the soapy water works all the way through.
- Work on any stains. Add a drop of cleanser straight onto stained spots and massage it in gently with your fingertips.
- Rinse until clear. Hold the sponge under warm running water and keep squeezing gently until the water runs clear with no suds.
- Squeeze and air dry. Press out as much water as you can, then let the sponge dry on a clean paper towel somewhere open.
The AAD’s wording for the last two steps: “Remove the sponge and hold it under warm running water, keeping it there until the water runs clear.” Then, “Squeeze out the excess water, and let the sponge air dry on a clean paper towel.”
Throughout, squeeze and press rather than twist or wring. Beautyblender warns that “Over-scrubbing or twisting the sponge can cause it to tear prematurely,” and a torn sponge is harder to get clean.
Clear water is a good sign, but not a guarantee. Beautyblender’s myths page notes: “Even when the water runs clear, your sponge may still have makeup buildup deep inside.” A simple check (our practical tip): press the damp sponge onto a clean paper towel. If you still see foundation color, give it one more round of soap and rinse.
How to get stubborn foundation out of a makeup sponge
Long-wear and full-coverage foundations can take more than one round. If the sponge still looks stained after the first rinse, repeat the soap-and-rinse steps rather than scrubbing harder.
- Treat the stain directly. Clean My Space suggests dabbing a small amount of cleanser onto the stained areas, massaging it in with your fingertips, and rinsing by squeezing until the water runs clear.
- Let the soapy water do the work. Beautyblender’s own method has you work the cleanser into a lather while the sponge sits in a bowl of water, which helps loosen dried-on makeup.
If a stain won’t budge after several careful washes, that’s a sign the sponge is near the end of its life. Dr. Sonia Badreshia-Bansal, a board-certified dermatologist quoted in Parade, lists persistent staining among her reasons to replace a sponge (more on replacing it below).
Should you microwave, boil or machine-wash a makeup sponge?
Search for how to clean makeup sponges and you’ll find plenty of hacks. Here’s what the sources say about the three most common ones.
The microwave hack
Some guides suggest microwaving a sponge in a cup of soapy water. The sponge’s original maker disagrees. Beautyblender’s cleaning guide says: “Forget the hacks you’ve read about microwaving (please don’t) or pouring vinegar (no, no, no) on your blender.” Its myths page adds that microwaving “can cause your sponge to break down, deform, or even catch fire.”
Asked about microwaving, Dr. Jaliman told Parade: “This can damage the sponge and doesn’t kill all bacteria.” And when a Homes & Gardens writer tried the hack, she found hot water still trapped inside the sponges when she squeezed them. Her usual method, rubbing the sponges with baby shampoo in cold water before rinsing, is in her words “far more effective, and far less risky.”
Our safety note: water held inside a sponge can stay hot enough to burn your hands after it comes out of the microwave. The soap-and-water method above is simpler and safer.
Boiling water
Boiling or very hot water has the same problem without the fire risk. Beautyblender’s myths page says: “Extreme heat damages the sponge’s material instead of making it cleaner.” Warm water and soap clean the sponge without breaking it down.
The washing machine or dishwasher
Some guides suggest putting sponges in with a load of laundry. None of the dermatology sources or manufacturer guidance we checked recommend a washing machine or dishwasher, and none give a method for it. Washing by hand, as the AAD describes, is the approach with support behind it.
How to dry and store a makeup sponge
Knowing how to wash makeup sponges is only half the job. Drying matters just as much, because a sponge that stays damp is where bacteria and mold grow. The AAD says to let it air dry on a clean paper towel. Beautyblender’s guide says to let it dry “completely in a clean, well-ventilated area.”
Be patient. Healthline notes that sponges “can sometimes take a few days to dry completely after being washed.” If you use a sponge every day, that’s where a second one in rotation helps: one dries fully while you use the other.
If you’ve washed your sponge to use again right away, just squeeze out the excess water and use it damp, which is how it’s designed to work. Full air-drying matters most before you put it away or pack it.
Where you keep it matters too. Dr. Kellie Reed, a board-certified dermatologist, told Today: “Darkness, lack of oxygen and a wet environment are a good trifecta for encouraging mold to grow.”
- Do: squeeze it well, then roll it gently in a clean towel to pull out extra water (a tip from Clean My Space), and leave it on a paper towel or an open stand.
- Do: use a mesh bag or ventilated case for travel. Dr. Reed’s advice: “Consider a mesh bag if you must put it in a bag to allow for further drying.”
- Don’t: put a damp sponge back in a zipped makeup bag, a drawer or a closed case.
- Don’t: speed it up with a hair dryer, a radiator or the microwave. Heat damages the sponge.
When to replace a makeup sponge
Even a well-washed sponge wears out. Rea Ann Silva, the celebrity makeup artist who founded Beautyblender, says: “We say every three months, but it might be easier to remember to change your Beautyblender every season and sometimes before that, depending on your use and the condition of your Beautyblender.” Parade gives a similar range: “Every three to four months is a good rule of thumb if you use them regularly.”
Replace it sooner if you notice any of these signs, drawn from Dr. Badreshia-Bansal’s advice and Beautyblender’s replacement guide:
- tears, cracks or small pieces breaking off
- a bad smell that stays after washing, which Beautyblender says “could indicate bacteria growth”
- stains that don’t come out after several thorough washes
- it no longer springs back to its original shape, or it feels stiff
- dark spots, which usually mean mold
On that last one, Beautyblender is direct: “If you spot small or large dark spots on your Beautyblender, you should dispose of it as it’s most likely mold.” Don’t try to wash mold out; throw the sponge away.
Sponges and makeup wear out on different schedules. Your products have their own shelf lives, so it’s worth knowing how long your makeup products last too.
Frequently Asked Questions
Can you clean makeup sponges with dish soap?
You can, but sources disagree. Clean My Space lists gentle dish soap as an option, while Beautyblender warns that dish detergent can damage a sponge. The AAD’s method simply calls for a few drops of liquid cleanser or soap. Our reading: use a gentle liquid soap for everyday washes, and keep a small amount of dish soap for oily, long-wear foundation, rinsed out thoroughly.
Can you clean a makeup sponge with rubbing alcohol?
It isn’t recommended. Beautyblender lists alcohol-based cleansers among the products that can damage a sponge, and none of the dermatology sources we checked suggest alcohol for sponges. Because a sponge soaks up whatever you put on it, it’s also hard to rinse out fully. Warm water with a few drops of gentle soap is the better-supported method.
How long does a makeup sponge take to dry?
Longer than most people expect. Healthline notes that sponges can take a few days to dry completely after washing, depending on the sponge and the room. Squeezing out as much water as possible and rolling it in a clean towel speeds things up. Let it dry in the open, never in a closed bag, and don’t use heat.
Should a makeup sponge be wet or dry when you use it?
Blending sponges like the Beautyblender are designed to be used damp. Beautyblender says, “Using it dry is one of the biggest mistakes people make,” and advises you to “Squeeze out excess water until it’s damp, not dripping.” A damp sponge helps press foundation into a thinner, more natural-looking layer. Materials differ, so check your own sponge’s instructions too.
Can you clean makeup brushes the same way?
Not quite. Brushes need a gentler approach: you wash only the tips so water doesn’t loosen the glue holding the bristles, and you dry them flat or tilted downward. They also need washing less often than sponges. Our guide to how to wash makeup brushes covers the full method, what to use and how often.
What do black spots on a makeup sponge mean?
Dark spots on a makeup sponge are most likely mold, according to Beautyblender, which says to throw the sponge away. Don’t try to wash mold out, and don’t use the sponge on your face again. To prevent it, dry sponges completely in an open, well-ventilated spot after every wash, and never store them damp in a closed bag or case.
Can you share a makeup sponge?
It’s best not to. The FDA advises against sharing makeup, and a used sponge carries oil, dead skin and bacteria from whoever used it last. If a friend borrows yours, wash it thoroughly before you use it again. If you do makeup for other people, use a fresh or freshly washed sponge for each person.
Should you wash a new makeup sponge before using it?
It isn’t required, but it’s a reasonable habit. A new sponge may have picked up dust from its packaging or handling. Our practical advice is to wet it and wash it once with warm water and a few drops of gentle soap, using the steps above, before its first use. Squeeze it out well, and use it damp or let it dry fully.
Should you replace your sponge after a skin or eye infection?
Our practical advice is yes. The FDA advises throwing away eye makeup after an eye infection because it could be contaminated, and the same logic applies to a sponge you used during that time. Replacing it is the simpler, safer choice. See a doctor or dermatologist about the infection itself.
The short version
If you remember one thing about how to clean makeup sponges, make it this: squeeze the sponge in warm water with a few drops of gentle liquid soap, rinse it under warm running water until the water runs clear, squeeze out the excess and let it air dry in the open. Do it after every use, and never go more than a week.
Skip the microwave, vinegar, very hot water and household cleaners, and never store a damp sponge in a closed bag. Replace it about every three months, sooner if it tears, smells, stays stained or loses its shape, and right away if you see dark spots. A clean sponge blends better and is kinder to your skin.